
You don’t have to be a serious yogi to master a tripod headstand—or to get big benefits out of it. “A lot of people see other students doing headstand and assume it’s impossible, but with the right tools, anyone can learn to do it,” says Jenny Finkel, a Chicago-based certified yoga and fitness instructor and Fitbit Local Ambassador. “And it’s very empowering and exciting once you do.”
What’s more, being able to hold a headstand builds not only your confidence, but also your core strength and coordination, says Finkel. Added bonus: It gives you a new perspective: “When you’re physically inverted, you get to see the world from a different angle.”
Are You Ready to Attempt a Tripod Headstand?
There are a few benchmarks that can help you answer that question, says Finkel. First of all, you should be able to hold plank for one minute. You should also have a solid chaturanga and warrior III pose.
Once you have those down, move on to mastering something Finkel calls “the beauty queen trick.” To do it, balance a heavy cork block or hardcover book on your head while you’re sitting or standing. This teaches you to keep your neck long—instead of tucking your chin or arching your neck—and it gets you used to the feeling of having pressure on top of your head, says Finkel.
How to Do a Headstand
Ready to turn your worldview upside-down? This step-by-step guide will get you there. Start at step 1 and only progress to the next step when you can maintain proper form. For added support, face a wall or have a friend spot you.
Step 1
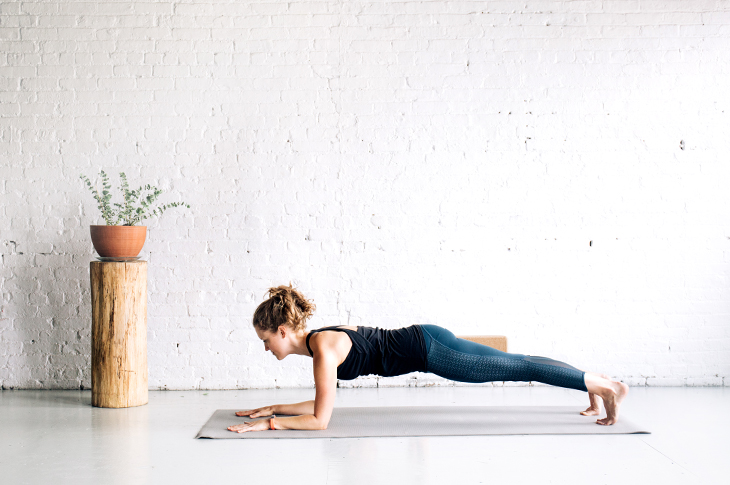 Get into forearm plank but hold a yoga block—ideally a cork block, as they’re heavier—between your thighs just above your knees. This forces you to activate your leg muscles and gives you a deeper sense of core engagement. Hold the pose for five to eight breaths, or about 30 seconds to a minute.
Step 2
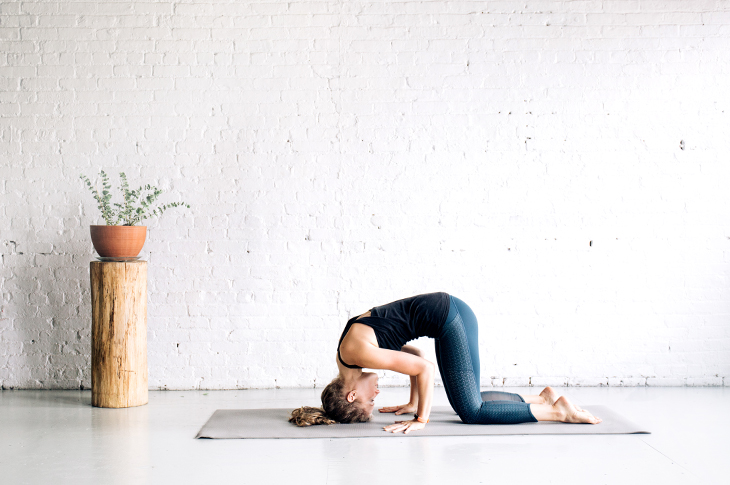 Lose the block and get down on your hands and knees. To set up for tripod, build a triangle with your hands at the base and your head at the apex, keeping your knees on the ground. Your arms should be bent at a 90-degree angle, with your elbows directly over your wrists and in line with your shoulders. Keep your neck long and resist the urge to collapse your shoulders toward your ears.
Step 3
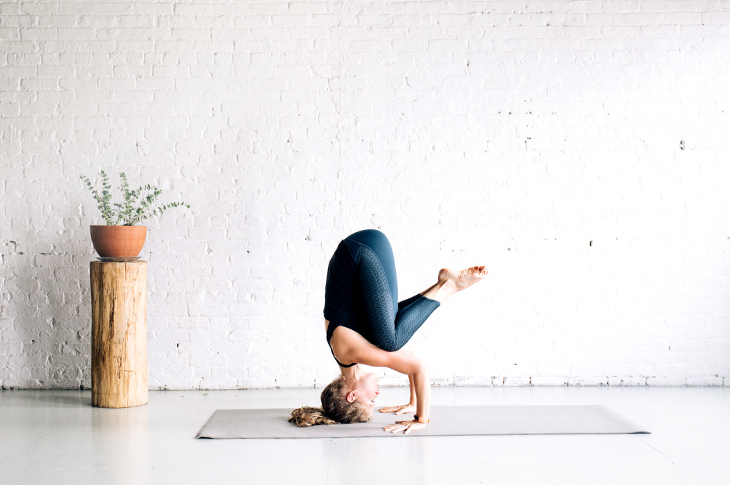 Tuck your toes and lift your knees off the ground. Slowly walk your feet toward your hands until you can rest your knees on your triceps. Lift your feet off the ground and touch your big toes together.
Step 4
 Pull your heels toward your butt and squeeze your knees together to activate your core. You should start to feel your knees float up off of your triceps (it’s okay if they hover just an inch or so above your arms).
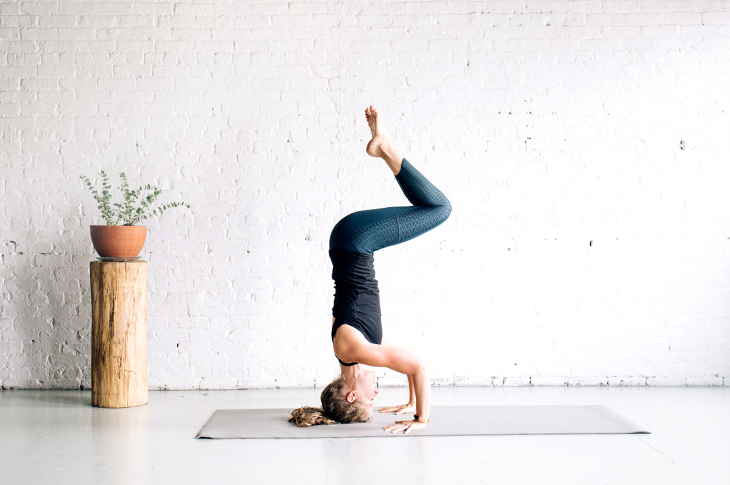
Step 5
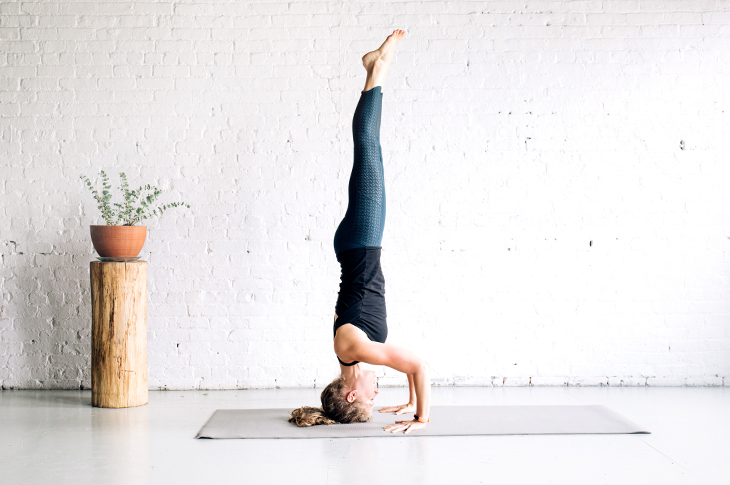 Unround your tailbone, keeping your legs active (just like in plank and warrior III) as you reach your feet toward the sky. Hold for a couple of breaths or up to a minute.
To release, bend at the hips and knees, bringing your knees back to your triceps and releasing your feet to the floor. Finish by holding child’s pose for a few breaths to prevent a head rush before returning to an upright position.
That’s it. You’ve just nailed your first tripod headstand. Congrats!
This information is for educational purposes only and is not intended as a substitute for medical diagnosis or treatment. You should not use this information to diagnose or treat a health problem or condition. Always check with your doctor before changing your diet, altering your sleep habits, taking supplements, or starting a new fitness routine.
Juno DeMelo

Juno DeMelo lives in Portland, Oregon. She writes essays and stories about food, people, places, and health. Her work has appeared in Glamour, Bon Appétit, Marie Claire, Cosmopolitan, O, The Oprah Magazine, Women's Health, Men's Journal, Good Housekeeping, Redbook, Shape, and more.
If you have questions about a Fitbit tracker, product availability, or the status of your order, contact our Support Team or search the Fitbit Community for answers.
Please note: Comments are moderated and may not appear immediately after submission.