
It might sound too good to be true, but interval training is one get-fit-quick scheme that actually works.
A research review published in The Journal of Obesity shows that high-intensity interval exercise (repeated all-out efforts followed by low-intensity exercise or rest), spurs significantly greater fat loss than longer sessions of moderate-intensity exercise, like a jog or brisk walk—even in people with a normal BMI.
In one study, young women who did a 20-minute, high-intensity-interval session (8-second sprints followed by 12 seconds of easy cycling) three times a week for 15 weeks lost nearly 6 more pounds of fat than women who cycled in the fat-burning heart-rate zone for 40 minutes.
Impressive results—and now it’s easier to get them. The Fitbit Charge 2 comes with a built-in interval timer that takes the work out of setting up and following an interval workout. No more staring at the clock. No more incessantly checking your wrist. Just you, your workout, and your trimmer torso. Here’s how to get started.
How to Set Your Fitbit Charge 2 Interval Timer
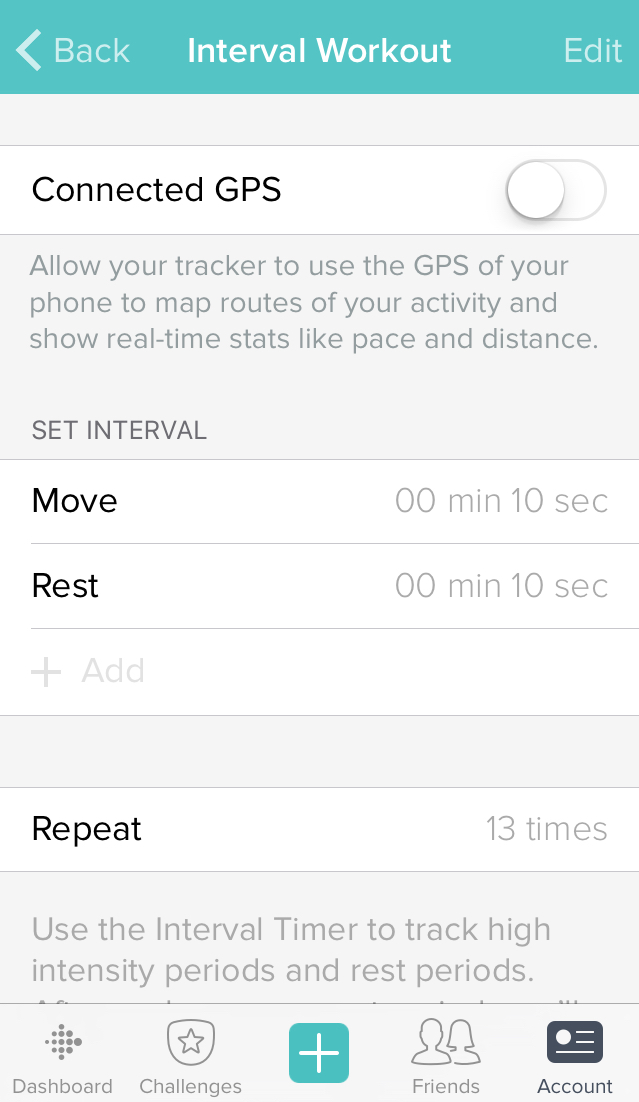
To create (or set) an interval workout, you’ll need to know three things: the duration of the “work” period, the duration of the “rest” period and how many rounds you want to complete.
For instance, if you want to complete a 20-minute workout made up of 1-minute intervals, the work period would be 1 minute, the rest period would be 1 minute, and the total number of rounds, or times you want to repeat those intervals, would be 10.
You can program your Fitbit to track these intervals by customizing the “Interval Workout” setting via your Fitbit app or the Fitbit.com dashboard.
 If you’re using the Fitbit app for iOS or Windows 10:
- From the dashboard, tap the “Account” icon in the lower right corner.
- Tap the horizontal Charge 2 tile.
- Scroll down and tap “Exercise Shortcuts.”
- Tap “Interval Workout.” If “Interval Workout” isn’t listed in the menu, you’ll need to add it to your exercise shortcuts. (For step-by-step instructions, see How do I customize the Exercise menu on my tracker?)
- Fill in your Move, Rest, and Repeat preferences, as explained above.
If you’re using the Fitbit app for Android:
Instructions are the same as above, except instead of taping the “Account” icon to begin, you’ll tap your tracker tile.
If you’re using the Fitbit.com dashboard:
- Log in and click the gear icon at the top right corner.
- Click “Settings.”
- In the column on the left, choose “Devices” and then Charge 2 if you have more than one tracker linked.
- Scroll down to “Interval Workout” and set your intervals. If “Interval Workout” isn’t listed, you need to add it to your shortcuts. Scroll up to “Exercise Shortcuts”, check the box next to “Interval Workout” and click “Save”.
How to Start Your Interval Workout
When you’re ready to begin your actual workout, all you’ll need is your tracker.
- Press the button on the side of your Charge 2 until you see an exercise option.
- Tap the screen until you see “Interval Workout”.
- Press and hold the side button to begin the workout. Your tracker will vibrate and light when it’s time to “move” or “rest”, depending on which interval you’re on.
At the end of your workout you’ll see two finish-line flags. Congratulations! You just got a huge health boost in a fraction of the time.
This information is for educational purposes only and is not intended as a substitute for medical diagnosis or treatment. You should not use this information to diagnose or treat a health problem or condition. Always check with your doctor before changing your diet, altering your sleep habits, taking supplements, or starting a new fitness routine.
Danielle Kosecki

Senior health and fitness editor Danielle Kosecki is an award-winning journalist who has covered health and fitness for more than 10 years. She’s written for Glamour, More, Prevention, and Bicycling magazines, among others, and is the editor of The Bicycling Big Book of Training. A New York native, Danielle now lives in the Bay Area where she doesn’t miss winter at all.
I wish there was a chime or a sound alarm when the interval ends. The vibration intensity is pretty subtle. I miss it frequently.
The Charge 2 doesn’t have a speaker.
I agree. I’ve only tried it the first time today and missed the first signal. I tightened the watch, but felt like I still had to concentrate in order to be sure I detected it.
Is interval training available on the Surge?
What is the +Add feature? I can’t utilize it. I would love to program intervals of varying lengths, is that possible?
The iOS app is buggy; the pickers for setting the times don’t render correctly.