 We know the importance of walking and getting in your steps, but cardio isn’t the only type of exercise you should be doing. Strength training matters too. Not only can strength training help increase bone density (and help ward off the brittle bones of osteoporosis), but it can also boost your metabolism and help you lose weight, too.
The good news? You don’t need a 20-pound dumbbell to get in a good strength training workout — in fact, all you need is a 1-ounce resistance band. Really.
Why Resistance Bands?
Resistance bands are the perfect tool for sculpting or toning your muscles on-the-go — whether you’re traveling across the country or just down the road to your local park, says Cris Dobrosielski, a spokesperson for the American Council of Exercise and the owner of Monumental Fitness Results, in San Diego, California. “Doing more reps, say 3 sets of 15 reps, provides a muscular endurance benefit, we well as some amount of hypertrophy, or muscle building,” he says.
If you’re a beginner or intermediate exerciser, start with a lighter resistance band (like 5 to 15 pounds of resistance). If you’re an advanced exerciser, you can opt for a moderate or heavy band. Don’t think bands pack enough power for your strength training routine? Think again. Some bands can pack more than 300 pounds of resistance!
7 Resistance Band Exercises to Add to Your Walk
Double up on your walk by getting both cardio and strength-training benefits. Incorporate these seven moves into your usual walking routine.
Band Pull Aparts
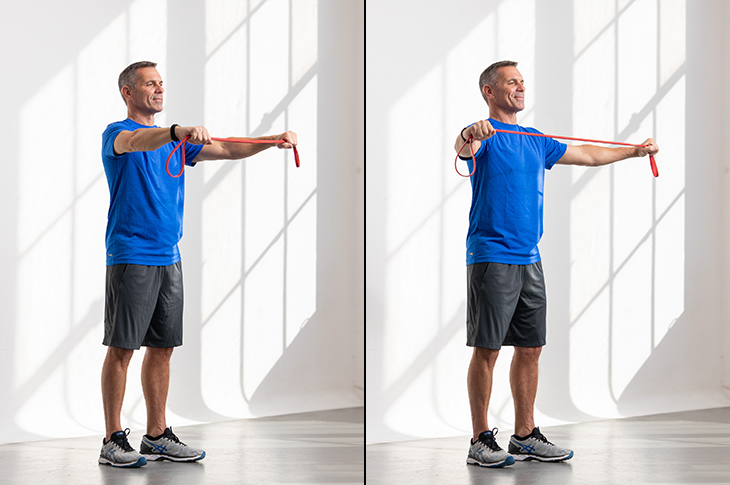
The benefits:Pulling exercises are particularly good at recruiting multiple muscle groups — which also burns more calories, says Dobrosielski.
Targets: Shoulders
Directions:
1. Hold a resistance band with both hands at shoulder width and shoulder height, with your palms facing the floor.
2. Keeping your arms straight but not locked, pull the band in a lateral motion, out past your sides. The band should come toward your chest as you pull.
3. Pause, then return to the starting position. That’s one rep.
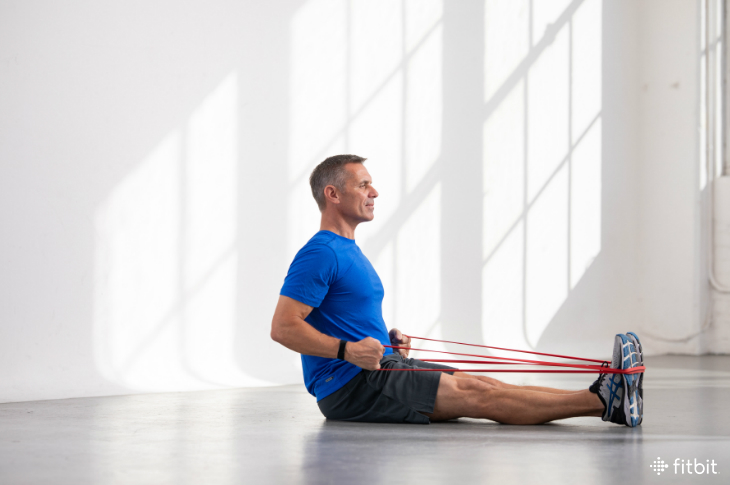
Banded Rows
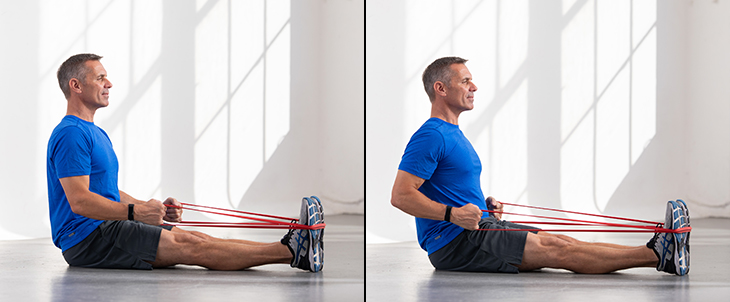
The benefits: Some people overlook the muscles that they can’t see in the mirror. By targeting your back muscles, you’ll build better posture and ward off future injuries.
Targets: Back
Directions:
1. Sit on the floor with your legs extended straight out in front of you, and loop the resistance band around your feet. Then, hold the band in each hand with a hammer curl or neutral grip, (thumbs pointed at the ceiling). That’s the starting position.
2. Keeping your back straight, slowly pull the band toward your core, squeezing your shoulder blades together. Pause, then slowly extend your arms toward your feet, returning to the starting position. That’s one rep.
Lateral Band Walks
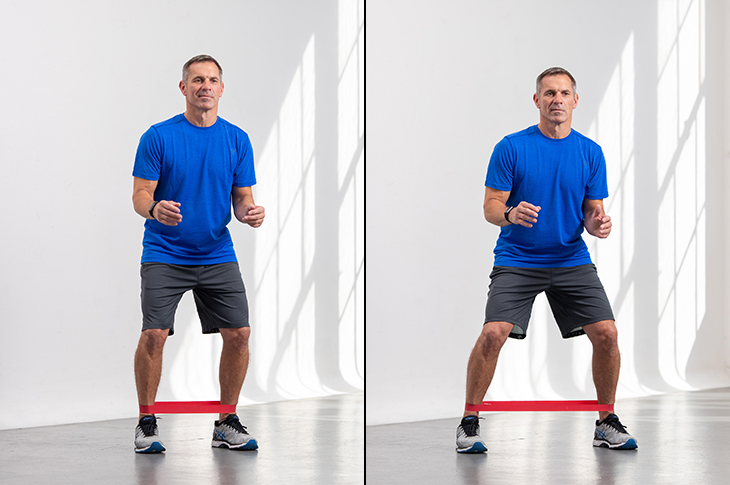
The benefits: About 80 percent of adults will experience back pain at some point in their lives, according to the National Institute of Health. But exercising your glute muscles can go a long way toward building a stronger, healthier lower back, says Dobrosielski.
Targets: Glutes
Directions:
1. Loop a band around your ankles. Start with your knees slightly bent and your feet positioned shoulder-width apart.
2. Next, keeping your shins vertical and right over your ankles, take a lateral step with your right foot, followed by a smaller step to the right with your left foot. That’s one rep.
Banded Biceps Curls

The benefits: Bicep curls are a classic exercise for a reason — but you don’t need dumbbells (or a barbell) to build stronger arms.
Targets: Biceps
Directions:
1. Hold the resistance band in both hands, keeping your arms at your sides and your palms facing forward. Then, step on the center of the resistance band with one foot (or two feet, for more resistance). That’s the starting position.
2. Bend at the elbows and curl the band up toward your shoulders. Pause, then lower your arms to the starting position. That’s one rep.
Banded Push-Ups
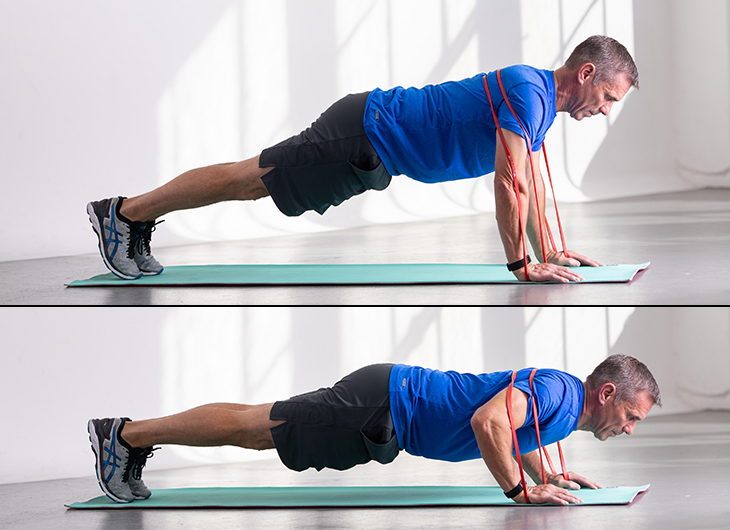
The benefits: The plank is often touted as the ultimate ab exercise — so consider the push-up a core and chest workout.
Targets: Chest
Directions:
1. Loop a resistance band around your back and position the ends around your thumbs.
2. Lower yourself to the ground and place your palms and toes on the floor. Your hands should be directly below your shoulders, and your body should form a straight line.
3. Bend your elbows and lower your body toward the floor until your chest nearly touches the ground. Hold for one second, then return to the starting position. That’s one rep.
Banded Hip Thrusts
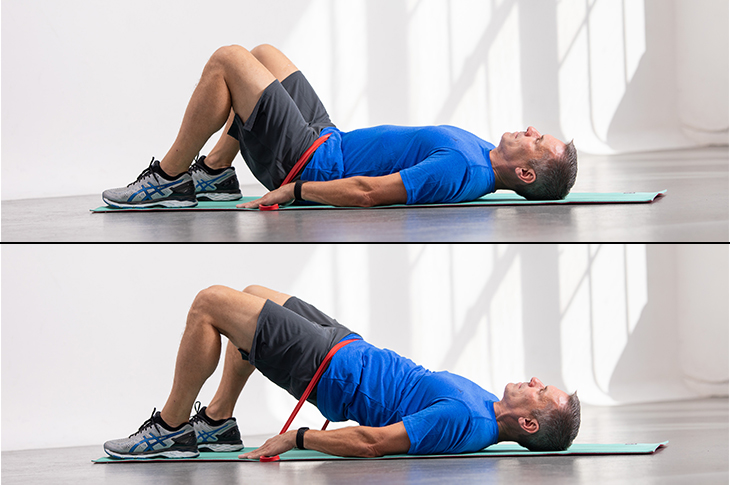
The benefits: Hip thrusts target your hips, glutes, and hamstrings, while also strengthening the hip bones — which are increasingly prone to fractures as we age[2].
Targets: Glutes and hamstrings
Directions:
1. Loop a resistance band around your thighs and place it at your hip crease, then lie face-up on the floor, keeping your knees bent and your arms extended out to the sides.
2. Using your arms to anchor the band to the floor, press through your heels and lift your hip toward the ceiling until your body forms a straight line from your knees to your chest. Remember to squeeze your glute muscles as you raise your hips. Pause, then lower to the starting position. That’s one rep.
Banded Squats
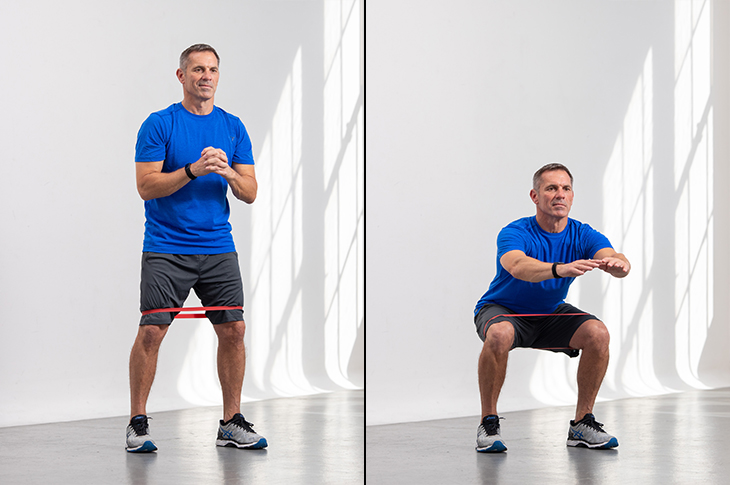
The benefits: Compound movements like squats work more muscle and burn more calories than isolation exercises.
Targets: Quads
Directions:
1. Loop a band around your thighs, just above your knees. Keep your feet positioned shoulder-width apart, your knees slightly bent, and your hands straight out in front of you.
2. Shift your weight back onto your heels and sink down until your thighs are parallel with the floor.
3. Pause, then return to the starting position. That’s one rep.
Looking for a more challenging variation? Try this version of banded squats:
Directions:
1. Stand on one end of a large looped band with your feet shoulder-width apart. Grabbing the band with both hands, squat down and loop the other end of the around your neck and return to standing while continuing to hold onto the band with both hands.
2. Keeping your spine neutral and core tight, shift your hips back while keeping your weight in your heels as you lower down into a squat. Try and lower until your thighs are parallel to the floor.
3. Pause at the bottom, then forcefully press down through your heels to return to standing. Squeeze your glutes at the top of the movement as you press your hips forward. That’s one rep.
This information is for educational purposes only and is not intended as a substitute for medical diagnosis or treatment. You should not use this information to diagnose or treat a health problem or condition. Always check with your doctor before changing your diet, altering your sleep habits, taking supplements, or starting a new fitness routine.
Maria Masters

Maria Masters is a writer and editor focusing on health, weight loss, and fitness content. She has held staff positions at Men’s Health and Family Circle, and her articles have appeared in Health, Women’s Health, EverydayHealth.com, MensJournal.com, and more. She holds a B.A. from the University of Pittsburgh.
If you have questions about a Fitbit tracker, product availability, or the status of your order, contact our Support Team or search the Fitbit Community for answers.
Please note: Comments are moderated and may not appear immediately after submission.